Sunday, December 28, 2014

Colorful Chevron Baby quilt: Process Post

Using ideas from DIYMommy (who was following Melanie at craftycupboard), I decided to make this chevron baby quilt. Always wanted to know the difference between chevron and herringbone? Check out this good explanation by Christine at Remodelista. or this post at Houzz which has some good photos.

I wanted my quilt to be a little bit bigger, so I cut 3" x 11" rectangles (48 from a white-on-white fabric, and 48 from assorted colored fabrics from the selection in this post). I put them all up randomly on my design wall (made from Warm + Natural batting nailed to the wall) and then arranged them to form a color gradient, with blues/greens on the right, purples/tans on the left, and pinks/oranges/yellow in the middle:
Then moved them around some more, trying to make the colors from the different prints flow from one to the next, as well as make some kind of gradient of values (light to dark):
Until I found a pleasing arrangement, then I began to cut the angles off the edges of the fabric. You can see here where I've cut the first two rows (on the left):
All the pieces cut, now I need to sew them together:
Sewed all the rows together, now just need to sew the three sections together and quilt: 

EDIT 1/10: Top completed, now I just need to quilt and bind it. This turned out longer than I like, but I don't feel like cutting part of it off. It's interesting how it looks different to me when I turn it upside down. I think I like it better turned this way than how it's been on the design wall all along:

Thursday, December 25, 2014

More quilt ideas

The nice thing about EQ6 is I can quickly mock up an idea of something. For example, I saw this lovely herringbone quilt by Christina at DIYMommy and am thinking about making it for this baby quilt, but wanted to know just how different it would look to have the strip angles at 45 degrees vs 60 degrees, so I did these two EQ6 samples (again, not terribly pleased with the limited color palette):

This has strips at 60 degrees:
This has strips at 45 degrees:
I definitely like the one with 60 degrees better. Then I started thinking about making the 'blocks' wider than they are tall. In the EQ6 mockup - you can't see the block outlines on the images I exported, but I wanted the width to be greater than in the image above, so I did this one:
It doesn't really look wider on the screen, so it's deceptive, but ultimately there ARE more strips

What about this one, the strips are cut at 75 degrees:
I think I like the top one the best.

Sunday, December 21, 2014

Next quilt: light color palette

I picked out these fabrics for the next baby quilt I'm making. They're a much lighter palette than I usually work with.
I've been in love with this quilt by Kathy Doughty for awhile now, so I thought of doing a smaller version of it (here is an EQ6 mock-up with its limited color palette):
But then I saw this interesting triangle design on this chair on Pinterest (the fabric is Harlequin by EDIT) so I mocked up a simple version on EQ6:
The idea would be to have some grays as 'sashing' between some of the triangles. I like the idea of it, but I would want it to be less 'organized' than this mock-up. I'll have to think a little bit longer about what I want to do with these light fabrics.

Recent paintings


Baby quilt - green/pink/purple triangles, front and back


Here was my mock-up on EQ6:

Sunday, July 6, 2014

Mr Sweaterz the sock monkey

At the request of Sophia, I made this sock monkey yesterday from these socks:
I followed this tutorial from the internet by Joanne L at craftpassion.com - it was pretty easy. I did all the stitching by hand except the first step sewing the lines for the legs and arms and ears. Check out the little green stripe at the base of the tail - I stitched around the tail 3 times to make it extra secure for all those times Mr. Sweaterz is thrown around by the tail:
Yesterday this monkey's name was Scottie, but apparently today his name is Mr. Sweaterz, with a 'Z'. Here is Mr. Sweaterz eating a blueberry muffin:
Here is Mr. Sweaterz riding the cat:
And here is Mr. Sweaterz with a bunch of random bling (including a little black jumper I made by snipping a few holes and adding a few stitches to the top of another sock):
And now I've been provided a pile of mismatched baby socks that demand to be made into baby monkeys!

Hexagon Quilt Finished

I finished this quilt at the end of May. I did a dark binding on the light side, a light binding on the dark side, and a medium binding on the straight edges.
Without the binding:
Here is one before the quilt was all pieced together:
I decided to go with the angular border on two sides, which was a bit tricky to bind, but I followed several tutorials from the internet. I do like how it turned out and it was a good challenge to learn the Y-seams. Here is the back. I used a lovely gray fabric from the Robert Kaufman Chambray Union line:
I did a basic meandering loopy-loop stitch, here is a close-up:
And some close-ups of the folded quilt, with those angular borders:


Sunday, April 13, 2014

The Moment of Truth: Why be afraid of Y-seams?

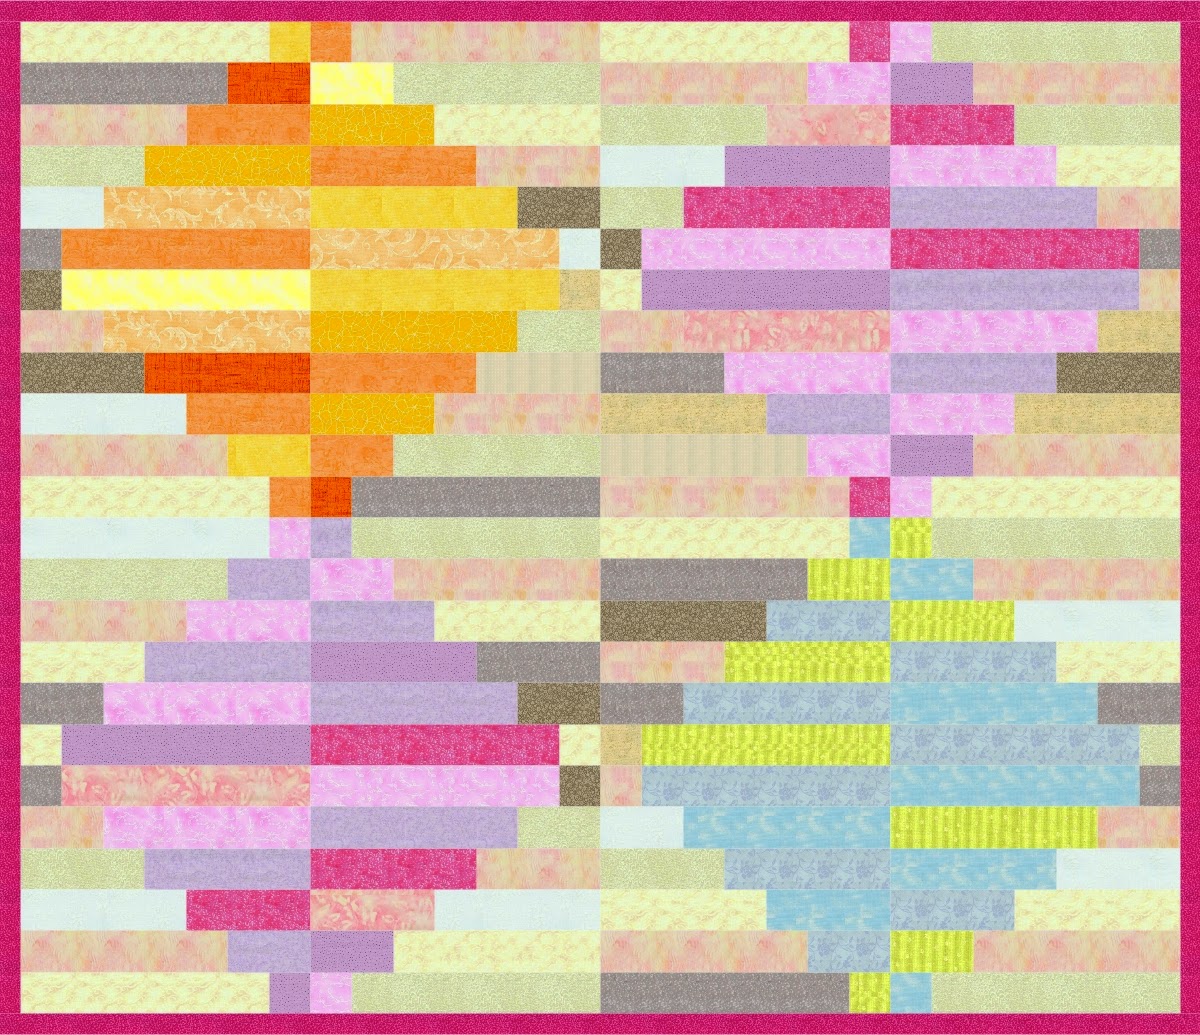
I really DO want to make this hexagon quilt (a simple mock-up I did using EQ6):
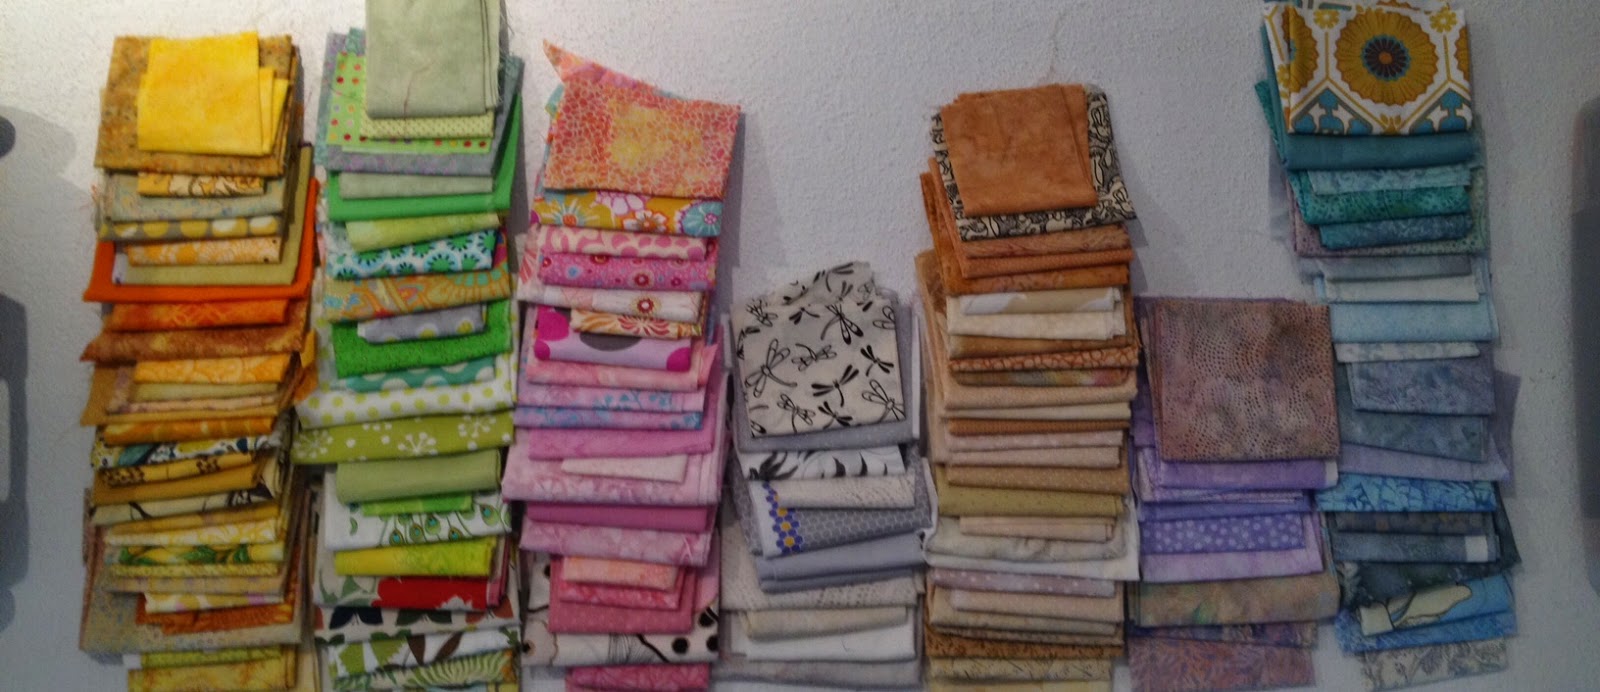
using this pile of fabrics
but something has kept me from doing it. I think it's my hesitation due to my lack of technical skill with Y-seams. That I recall, the only real Y-seams I've done were for the tail insertions in these stuffed animals (step 33 in the tutorial). Generally I avoid them with dread.

But how hard can it be? Seriously? I found these two great tutorials from bloggers that illustrate how easy it can be: Katie at From the Blue Chair shows how to cut hexagons without a template, which is fantastic in my book! And Jacquie at Tallgrass Prairie Studio shows how to sew hexagons together without marking the 1/4" lines. That sounds ideal to me, especially if it works! So here goes! (I'm doing this as a blog-as-you-go post, so I'll keep adding photos as I make this quilt, all in the same post.)

I chose the 6.5" x 7.5" rectangle in Kati's list and cut out a bunch to start with. Then I sewed a strip together following Jacquie's instruction:
Then, eager to overcome my hesitation and become a hexagon master, I started with the first hexagon of the second row... (Note: right at this point, I got up and wandered around looking for things to do around the house that absolutely HAD to be done right this moment, such as putting away the dishes, changing the laundry, picking up stray threads, sorting my sock drawer, transferring gesso from a jar to a bottle, etc.). Meanwhile, awhile later, I came back and read and re-read Jacquie's instructions, then dove in. Here is the first seam, pinned and waiting to be stitched:
 The finished seam - not the most perfect, but I'm certainly not going to pick it out:
Setting up the second seam:
The second seam stitched:
Here is the finished Y-seam of the 1st and 2nd stitch.
Yippee! The first hexagon Y-seam is done. It's all downhill from here! Now I need to decide how to address the borders. I busted out the markers since I didn't want to take time in EQ6 to figure out how to make the border I wanted. Here is a blank sheet of hexagons which I exported from EQ6:
Filled in with markers, with the idea of a border - I don't like the idea of a flat top/bottom border like in the image at the top of this post. But I'm still not sure what to do...
I really don't want the quilt to end up looking like a soccer ball. I do like this example of a hexagon quilt which has quite a large number of hexagons, way more than I plan to do. It just has a straight/flat border, which looks pleasing in this example. I also like the ends of this one where two ends stick out. I imagine the binding on that is a bit tricky... then there is this one by Malka Dubrawsky where all the sides are bound like that with no borders. Hmmm...

So maybe I'll do it this way (scissors came in handy):
I will do light binding on the dark side, and dark binding on the light side, with medium binding, perhaps, on the top and bottom... And now onto the selection of fabrics - I counted the number of hexagons for this design and I needed to eliminate more than half of my 100 fabrics. I started pulling some out of the pile and lined up ones I liked according to light, medium and dark value, to ensure I had a good spread across all values.
I put a light, medium and dark strip of fabric beneath each pile to help:
Now I'm cutting out the hexagons and throwing them up on the design wall:
Later on... more pieces on the wall - I really like the look of the white space in between the pieces on the right. I could add a thin sash of white in between the dark pieces and a sash of dark in between the light pieces- that would look awesome! (But I'm not going to do it for THIS project.)
All the hexagons cut out - this is a really small design wall so they don't all fit. They're overlapped:
I'll spend a bit of time switching around the pieces until I get to something I find pleasing. But I'm committed to not spending more than a week on swapping pieces. My goal is to have this finished (quilted and bound) before the end of April.

Saturday, April 12, 2014

Study for "What is North, Anyway?" acrylic painting

I was thinking the other day about the seemingly arbitrary nature of 'North' and 'South' - someone at some point in time picked those concepts to orient us to the magnetic poles of the Earth and maybe to relate to the orbit of the Earth and moon around the Sun. What is North, really, but one end of a magnetic pole? But we're constantly orienting ourselves in relation to 'North' - when we drive in our cars, when we're hiking in the mountains, when we're looking out the window of an airplane.

I was thinking about the idea of drawing a map with the freeways as thick lines and coloring the surrounding areas with blocks of color. I've seen some really interesting map-art in the last few years, including Paula Scher's maps. I wasn't sure what I wanted to do with a map-painting, but I primed a wood board and pulled out a scrap gelli print on bristol paper to use as a study. I drew a basic outline of the main freeways around Los Angeles on the paper using a green marker:
Then I filled in the areas with color.
Then I thought about rotating the painting and continuing from there, which is when I started thinking again about the idea 'What is North, Anyway" and how I could use that as another way to get art ideas flowing when I can't think of something to paint. It doesn't have to be freeways - it could be an outline of a familiar object, like a chair or a strange building across the street. Like Carla Sonheim's sidewalk cracks. Sketch the outline, then turn it sideways and see what other ideas come to mind.
When I turned this painting, I saw the idea of thick blue lines, so I painted what I thought should be there.
I'm pleased with the result so far. It seems very abstract. I'm not sure what I'll do with it next, or what I'll do with the wood board - I did add some pink lines to the board representing freeways.